Collection Viewの使い方(iOS/XCode/Storyboard/UICollectionView) 28/08/13 14:36
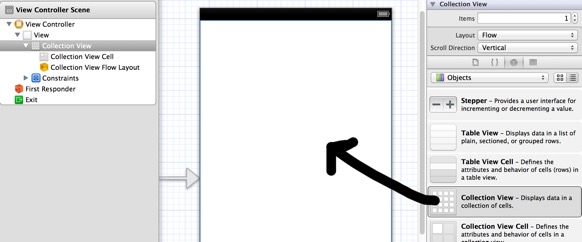
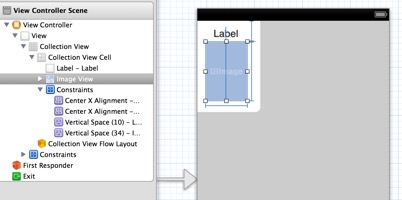
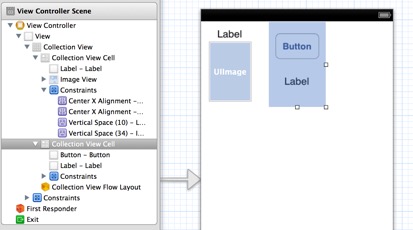
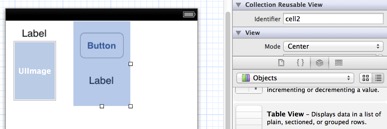
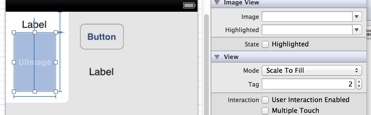
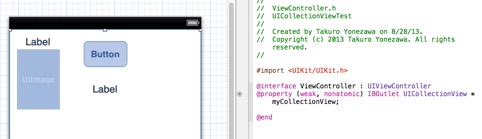
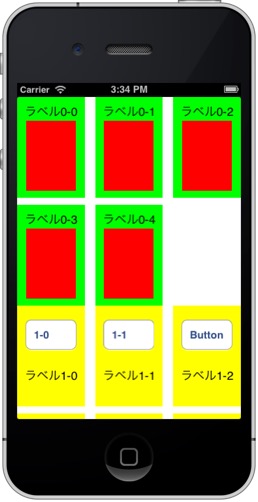
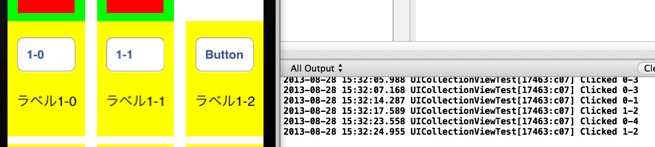
iOS6から追加されたUICollectionViewの使い方、UICollectionViewCell カスタムセルの作り方のメモ。基本的には UITableViewと同じ感じ でつくれます。 セルの中の各要素に後でアクセスするために、各ViewにTagを設定します。下図ではUIImageに2のTagを設定してます。Tagの番号は1からつけてください。 なお、異なるセル内にある部品だったら、Tag番号はかぶっていてもいいです。 @interface ViewController : UIViewController < UICollectionViewDataSource , UICollectionViewDelegate > @property ( weak , nonatomic ) IBOutlet UICollectionView *myCollectionView; @end #import "ViewController.h" @interface ViewController () @end @implementation ViewController @synthesize myCollectionView; void )viewDidLoad super viewDidLoad ]; // Do any additional setup after loading the view, typically from a nib. myCollectionView setDataSource : self ]; myCollectionView setDelegate : self ]; void )didReceiveMemoryWarning super didReceiveMemoryWarning ]; // Dispose of any resources that can be recreated. #pragma mark -collection view delegate NSInteger )numberOfSectionsInCollectionView:( UICollectionView *)collectionView // とりあえずセクションは 2 つ return 2 ; NSInteger )collectionView:( UICollectionView *)collectionView numberOfItemsInSection:( NSInteger )section{ if (section== 0 ){ // セクション 0 には5個 return 5 ; else if (section== 1 ){ // セクション 1 には 7 個 return 7 ; else { return 0 ; //Method to create cell at index path UICollectionViewCell *)collectionView:( UICollectionView *)collectionView cellForItemAtIndexPath:( NSIndexPath *)indexPath{ UICollectionViewCell *cell; if (indexPath. section == 0 ){ // セクション 0 のセル dequeueReusableCellWithReuseIdentifier : @"cell1" forIndexPath :indexPath]; backgroundColor = [ UIColor greenColor ]; UILabel *label = ( UILabel *)[cell viewWithTag : 1 ]; text = [ NSString stringWithFormat : @" ラベル %d-%d" ,indexPath. section ,indexPath.row]; UIImageView *image = ( UIImageView *)[cell viewWithTag : 2 ]; backgroundColor = [ UIColor redColor ]; else if (indexPath. section == 1 ){ // セクション 1 のセル dequeueReusableCellWithReuseIdentifier : @"cell2" forIndexPath :indexPath]; backgroundColor = [ UIColor yellowColor ]; UIButton *button = ( UIButton *)[cell viewWithTag : 1 ]; titleLabel . text = [ NSString stringWithFormat : @"%d-%d" ,indexPath. section ,indexPath. row ]; UILabel *label = ( UILabel *)[cell viewWithTag : 2 ]; text = [ NSString stringWithFormat : @" ラベル %d-%d" ,indexPath. section ,indexPath.row]; return cell; void )collectionView:( UICollectionView *)collectionView didSelectItemAtIndexPath:( NSIndexPath *)indexPath // クリックされたらよばれる NSLog ( @"Clicked %d-%d" ,indexPath. section ,indexPath. row ); @end